
I'm so pleased to be able to share
my tutorial for the Plaid Tongue Rug.
Affectionately known between Cee and me as the Tom Rug.
It was Tom Pryor's snippet of a penny rug photo that inspired me.
The lesson is...you can make any rug.
See it, be inspired, imagine it, and make your own version.

 |
| Cut a piece of lightweight wool or flannel to about 26 inches square. Remember to use up and make do, that's what penny rugs are about. Fold in half twice to find the center lines. Make a long running stitch both ways to mark your center. |
 |
| Lay out 2 inch mixed plaid pennies into 10 rows of 10. Yes, that's 100 2 inch pennies. I use scotch tape to hold my rows and I mark each row with a number. It really helps if this becomes a UFO and you don't get back to it for months. Remember to remove some of the stick of the tape. Press it to your jeans or other fabric before laying it on the pennies. |
 |
| Blanket stitch each penny, start from the center row and work outwards. |
 |
| Create a star at each center. Hide your back stitches inside, between the penny and the backing. I never make knots. |
 |
| Check your rows often to be sure they are even. |


 |
| Enjoy the work, take your time. This was my summer project. (explains why some photos are so bright) |
 |
| Almost done |

 |
 |
| Check your inventory and lay out forty 4 inch x 2 inch rectangles |
 |
| Start to work on the bias trim |
 |
| Trim each 4 x 2 rectangle, using a 2" circle temple, at one end only. |
 |
| Cut lots and lots of 1 1/2" bias strips. Did I say lots? Use a variety of plaids. I used approximately 15 yards. You need about 9 inches per tongue and about 3.5 yards for the backside trim. |
 |
| Joining a bias strip |

 |
| This is a 3/4" bias fold tip. Iron your strips into folds. |
 |
| If you're lucky enough, use the Simplicity bias maker to do the ironing. |
 |
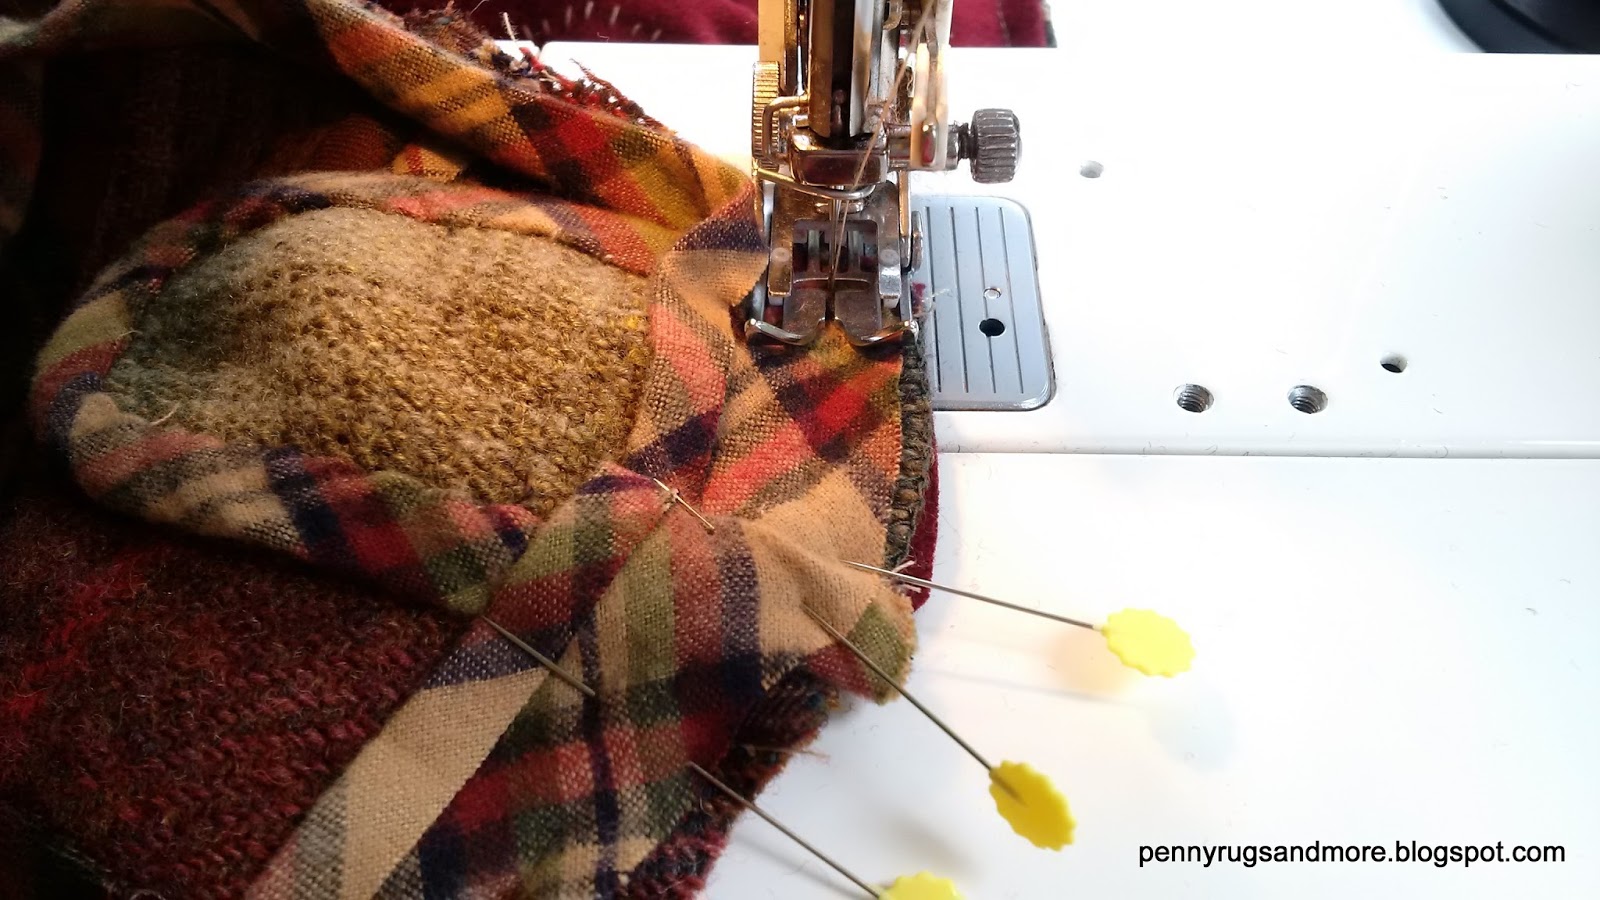
| Pin right side of bias to tongue and machine stitch. Stitching in the fold, ease around the corner. |
 |
| Hand stitch the back side of the bias trim. |
 |
| Lay out all your finished tongues. |
 |
| Stack them up and set aside. |
 |
| Masking tape the edges of your rug with 1" masking tape. I learned this great trick from my friend Cee at Early Style Penny Rugs! |
 |
| Carefully trim away the excess |
 |
| Now pin those tongues back in place. Right sides together. |
 |
| Carefully machine stitch, following the corner tongue, pivot at each edge to turn the corner. |
 |
| That was easy. Trim away the excess base (red) fabric at each corner. |
 |
| Now you've pinned the right side of your bias tape to the tongues, run around the edge with your sewing machine. Stitching the bias tape, following the fold line. Do a happy dance, you are almost done! |
 |
| Can you see the folded beginning end, underneath the presser foot, as I finish and meet up with the beginning of the bias tape. Overlapping for a neat ending. |
 |
| Turn out to show the beautiful right side |
 |
| Fold and pin the bias tape over at the back. |
 |
| Blind stitch the bias tape in place to finish. |
 |
| The back of the Plaid Tongue Rug |


Ta da!
Now challenge yourself, make your own version.
It doesn't have to have bound tongues, blanket stitch them instead.
The pennies don't have to be in straight rows,
alternate them.
Dream it, stitch it!
Check my YouTube Channel for the video version.
And review the "Oval Tongue Rug" tutorial for an
updated way to do binding.
Beautiful mat and beautiful way to finish the tongues.
ReplyDeleteDebbie
Thanks so much Debbie. I'm really pleased with it. Now on to find a new rug challenge!
DeleteYou had me up until the bias trim..Yowza that is spectacular, but not sure I'm up for the bias these days. It is gorgeous Colleen.
ReplyDeleteSnort! Thanks Z! Good thing I have left over bias...I'm good for a long while. I just HAD to make this rug.
DeleteReally great instructions Colleen!
ReplyDeleteThanks much Tina! I'm still doing little edits.
DeleteHearty congratulations on a job well done. Your rug is gorgeous and a treasure for sure.
ReplyDeleteThanks so much Synthia.
DeleteWHOA...this is one outstanding penny rug... very ambitious and creative! Super Job...
ReplyDeleteHi Barbara, thank you!
DeleteAn unbelievable amount of work to create an unbelievable penny rug! Did you happen to keep track of your hours? Thank you for sharing!
ReplyDeleteThank you Alice. Nope, I wish I had tracked the hours. But like most projects I just stitched and planned and enjoyed it. Other than the making of the bias it really went quickly, I had to slow myself down. I love to stitch.
DeleteWhat is the finished size of the rug? It's gorgeous!
DeleteThanks Judy, it's approximately 29" square.
DeleteI L*O*V*E* this one. I have plenty of plaid homespuns so I am thinking I see some bias binding in my future! Thanks for the great instructions ......
ReplyDeleteThanks for the heartfelt comment. If you have plaid, use it up. I love plaid! And bias is fun once you get the hang of it.
DeleteI have to agree with Barbara and Alice, absolutely 'the best' rug in both design and the way you constructed those tongues to the edge without a lining. Can't wait for your 'next' Beautiful and very creative work my friend!!
ReplyDeleteOh thank you Cee! Likewise, I can't wait to see your next rug.
DeleteThe back is as beautiful as the front!!
ReplyDeleteThanks so much Judy!
DeleteStunning tutorial! Your photos and tips are fabulous. I think I'm ready to jump right in on a large project like this. Thank you for sharing your work and teaching talent--breaking it down into steps. I just added your blog link to my 1893victorianfarmhouse blog and I am following yours. Best wishes.
ReplyDeleteThank so much Mrs. D!
DeleteThanks so much!
ReplyDelete