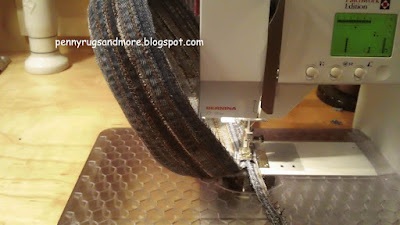
You can finish off with some lining and some straps. The bag is quite serviceable with no lining.
**Lining is another lesson, measuring the circumference of your bag for the sides and using the finished bag base, draw a circle for the base of your lining, every bag is different. Stitch finished lining to finished bag, wrong side together**
I made my straps from two long lengths butted together. Zig zag both sides of the joined strips, then stitch firmly in place. For this project use heavy duty size 16 or denim needles. (The thick layers of stitching the handles in place could cause needle breakage.)
How about a recycled leather belt for handles? Some vintage buttons for accents? Use up, make do. |


Gorgeous bag! Thank you for sharing this tutorial.
ReplyDeleteLove this idea, it looks gorgeous.
DeleteWhat a great idea! I wonder how many bags I could have made, if I hadn't thrown out so many pairs of jeans (we are a family of 6)? I have added this to my list of things to try. Thanks for sharing.
ReplyDeleteYou could also make denim mats or rugs. Just keep building the flat base until it's a usable size for a mat!
DeleteWhat size needle did you use?
ReplyDeleteHi Susan, I'm glad you like my bag, it's very simple to make.
Delete"For this project use heavy duty size 16 or denim needles. (The thick layers of stitching the handles in place could cause needle breakage.)"
Happy Stitching!
Colleen
thank you for sharing stunning chel xx
DeleteWonderful idea!!!
ReplyDeleteI have a huge bag full of jeans to recycle, and I never knew what to do with this part of the jeans. Thanks a lot for the tutorial.
Greetings from Venezuela.
grazie per questo tutorial. Molto bello e utile
ReplyDeleteThis is so fantastic! Thank you for sharing your tutorial.
ReplyDeleteSUPERBE IDEE J ADORE BIZ
ReplyDeletewow, what a fantastic idea!!! and now, i need more jeans...
ReplyDeleteK.
look in thrift store, usually can pick up jeans cheap. Just wash and dry, and your off to a really good start of stock piling your fabric. Don't be afraid to blend colors.
DeleteI wish you would sell this on Etsy, I would totally buy it. So cute!
ReplyDeleteGiving some of us an idea!
DeleteOh, My, Gosh!!! I love this and I have a huge stack of jeans in the attic just waiting for something... I see a sewing day in my future. Thanks so much for the tutorial. ~Ann
ReplyDeleteWow this is year 2015 and your tutorial on this gorgeous bag was the year 2012. But it's never too late to start saving the demin jean trims and building myself a gorgeous bag. I am looking forward to adding this type of bag to my bag collection; a felt felled seam bag. Thanks for this tutorial. :-)
ReplyDeleteThat's right Marian, start saving! It's a great sturdy bag that I use for toting projects around in.
DeleteWow, this is great! Your bag is stunning! Am saving mine up.
ReplyDeleteThanks much and thanks for stopping by.
DeleteThis is great ! I do have piles of old jeans too ... But I Wonder about the thickness of the 2 stripes ... Might be too much for my old machine ....But ... Your bag is great , I might give it a try , thank you for the idea ... I can try with a small table mat first .
ReplyDeleteHi Mascottblog. Only use one layer of the seam strips butted side to side. Two layers would definitely be too thick. Use two seams (or strips) for the handles, side by each. Use a heavy duty needle and strong thread. ENJOY!
DeleteQue gran idea, gracias por compartirla
ReplyDeletethank you for the idea.
ReplyDeleteVery beautiful!
ReplyDeleteColleen, I see you originally shared this back in 2012, and I just ran across it!! What a beautifully made bag. I have a pile of jeans just waiting to be transformed into something new. Thank you for sharing your tutorial.
ReplyDeleteLove love love it!!! Thanks for a great tutorial, very easy to follow. ~Diana from Toronto
ReplyDeleteA wonderful idea that I just found! I will try it right after I finish all the other wonderful ideas I have found!
ReplyDeleteI love your bag!
ReplyDeleteHow many yards of seams did you need to make your bag?
I think I needed about 14 pairs of jeans. You need plenty.
DeleteDid you use 100%cotton or stretchy (poly cotton blend) jean felled seams? or combination of both?
ReplyDelete